Mobile App Development Process: Step-by-Step Guide
Building an app without a plan is like setting off on a road trip with no map. The mobile app development process is like this map that guides you from a vague idea to a polished product.
However, if you go in without any analysis or prior learning about the process, it may result in failure. This is true for any job or avenue that you invest yourself in.
Research suggests that about two-thirds of consumer apps never reach 1,000 downloads, and startup research identifies poor product-market fit as a major failure reason. Looking at current app download trends can give you a clearer picture of market demand and competition.
A deeper analysis revealed that poor product-market fit was a major factor, meaning there was no market search performed before app development.
What that means in practical terms is that you can write perfect code and still end up with zero downloads if you skipped validating the market need. So let's learn what goes into the mobile app development process so you do not end up making a costly mistake.
If you're new, it helps to first understand what mobile app development actually involves before diving into the process.
What Is the Mobile App Development Lifecycle?
Think of the mobile app development lifecycle as the backbone of your entire project. It acts as a framework that keeps you from wandering off course, and staying committed to a proven process has helped several other app seekers like you.
It breaks down the journey into nine repeatable stages:
Strategy
Research
Planning
Design
Prototyping
Coding
Testing
Launch
Ongoing updates and maintenance
Studies on software methods confirm that agile approaches work better for mobile than rigid, step-by-step Waterfall planning. These are two approaches used during the mobile development process.
The agile approach, in comparison, is newer than waterfall and involves taking small steps, testing, and making corrections, which means it offers more flexibility than waterfall. Because in the waterfall approach, you have a small window to make changes as the process is rigid, meaning you complete one step from start to finish and only then move to the next.
To put that insight into action, when using an agile approach, expect to loop back, revise, and improve across multiple cycles.
Phase 1: Discovery & Idea Validation

Before writing a single line of code, you need to conduct market research in depth to figure out whether anyone actually wants your app. The app development stages begin with this research and follow a sequential order.
Interview potential users to uncover their real frustrations.
Analyze competing apps to spot their weaknesses and missing features.
Map out who your target audience is and what they truly need.
Sketch rough solutions on paper or whiteboards to test basic assumptions.
Also estimate whether the idea can eventually make money or serve a clear purpose.
Run small surveys or landing page tests to measure genuine interest.
Three Key Outputs Come Out of This Phase
Once you have the required information, prepare a one-page summary of the problem and your proposed fix. Then, work on the list of assumptions you must prove true before building. And only after you have followed each step, make the go or no-go decision based on evidence.
Research shows that apps and startups are more likely to survive when they start earning early and prove people actually want them. This means that every week spent coding without customer feedback is a week drifting toward failure.
This knowledge comes from studying thousands of startups and their survival rates, showing that incoming revenue after an appropriate length of research may become a solution in preventing many problems that may arise. So, you must always validate before you build; otherwise, you are just burning time and money.
If you're still exploring concepts, reviewing profitable app ideas can help you identify proven opportunities.
Phase 2: Product Planning & Strategy

Once you have proof that the idea has the capacity for success, you move into mapping out exactly what to build first.
The app development process forces you to make smart tradeoffs between speed, quality, and features. You will choose your technical direction from three main platform options:
Native means writing separate code for Apple and Android devices, which gives the best performance but costs more.
Cross-platform tools like React Native or Flutter let you write once and deploy everywhere, saving time but with minor compromises.
Progressive Web Apps run inside a browser and skip app stores entirely, though they lack access to some phone features.
You will also define your MVP, which stands for Minimum Viable Product. MVP is the smallest working version that still solves the core problem for early users. Think of it as the smallest possible peek through which you can launch while still delivering real value.
During the MVP development stage, you should focus on delivering these three key elements:
Make a list of non-negotiable features, separating them from extra features
Choose the technical specification with the platform and key tools
Create a timeline showing each development sprint and testing window
An MVP is not just a small product for a fraction of the cost, but it also helps you in learning faster, diagnosing problems, and figuring out solutions.
For instance, Dropbox validated its business with nothing more than a 3-minute demo video, which pulled in around 75,000 signups before the product was fully built.
The demo video showed exactly how the product would function, letting people picture themselves using it without any engineering investment. So ask yourself honestly: what is your equivalent of that low-cost, low-risk test?
Phase 3: Wireframing & App Architecture
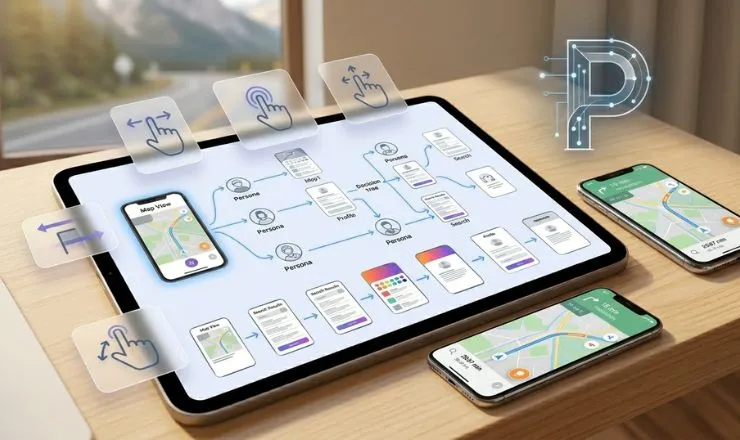
Before any code gets written, you need a blueprint or visual skeleton, a process called wireframing. This architecture made by wireframing is a low-detail map of screens and buttons without any colors or polish.
To start, you will outline the user's path from opening the app to completing their main task. From there, you will decide how data flows between screens and where information gets stored.
Then, you will map out connections to outside services like payment gateways or cloud databases. You will then agree on technical boundaries such as offline support or real-time syncing.
Tools to help you: Figma, Balsamiq, and Lucidchart.
An important fact to remember is that iterating on design is significantly cheaper than iterating on code. Iterating means repeating a process over and over, with each cycle making improvements in the previous version.
This means you should fix every layout issue, confusing button, and broken flow in the wireframe stage, not after development has already started.
Phase 4: UI/UX Design
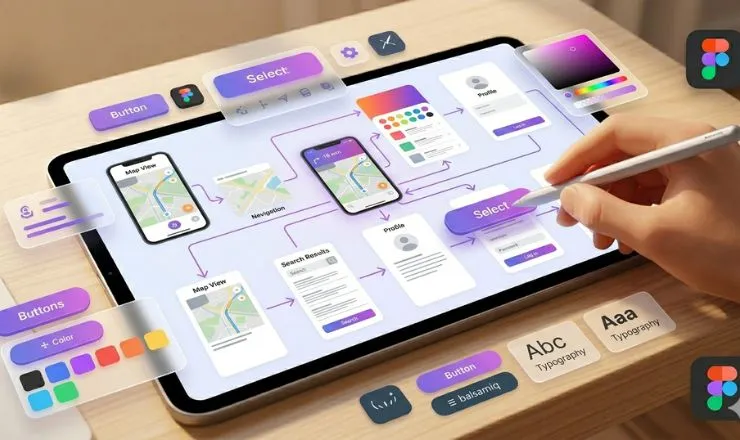
Once the blueprint is solid, you add the look and feel that people actually see and touch. This stage is split into two connected tracks: UI and UX design.
UI (User Interface) – Five Visual Ingredients
Color schemes that match your brand
Typography that stays readable on small screens
Button shapes that look clickable
Spacing that prevents accidental taps
Consistent icons that users recognize instantly
UX (User Experience) – Three Behavioral Elements
How many taps a task requires
Whether error messages actually help someone recover
If the navigation feels natural after repeated use
What You Will Deliver
Clickable prototypes that mimic real app behavior
A design system with reusable components and style guides
Accessibility notes for users with visual or motor limitations
Development teams spend a significant time and effort investment in this stage. For instance, data on the importance of UX shows that poor UX, including confusing navigation, slow feedback, and bugs, is a leading cause of app uninstalls, with the majority of users abandoning apps due to performance issues alone.
On the other hand, good UX can increase conversions, which means every single dollar invested in UX returns a greater amount over the life of your product.
Phase 5: Mobile App Development (Coding Phase)
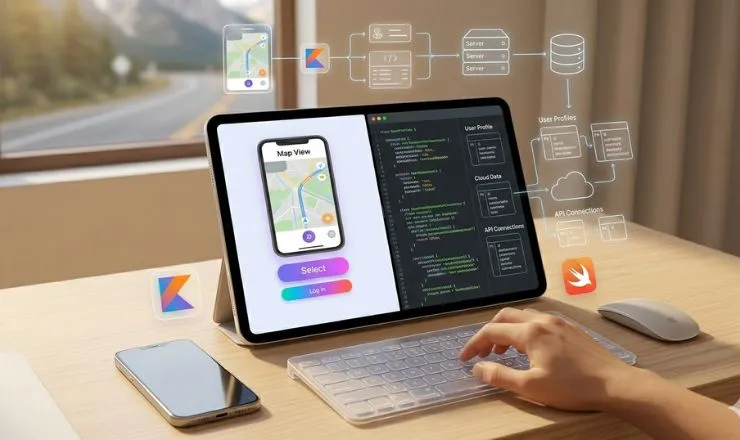
This is where ideas turn into something you can actually tap and swipe. The stage has two parallel tracks that work together behind the scenes.
Frontend Development
Frontend is anything the user sees and touches on their screen. You will write code for buttons, menus, animations, and forms using technologies that match your platform choice.
Common options include:
Swift for Apple devices
Kotlin for Android
React Native for cross-platform
Flutter for high-fidelity designs across both stores
Backend Development
Backend handles what happens away from the user's eyes, like logging in or saving data. You will set up:
Cloud servers to host your app logic
Databases to store user profiles and content
APIs to connect with outside services like maps or payments
Cross-platform tools like Flutter or React Native can save you costs compared to building two separate native apps.
If you're unsure which to choose, comparing Flutter vs React Native can help you decide based on your project needs.
That said, if you are bootstrapping with limited funds, start with just one platform. Instagram, for example, launched on iOS only and released Android later, which let the team focus on one platform first.
Phase 6: Alpha Testing (Internal Testing Phase)
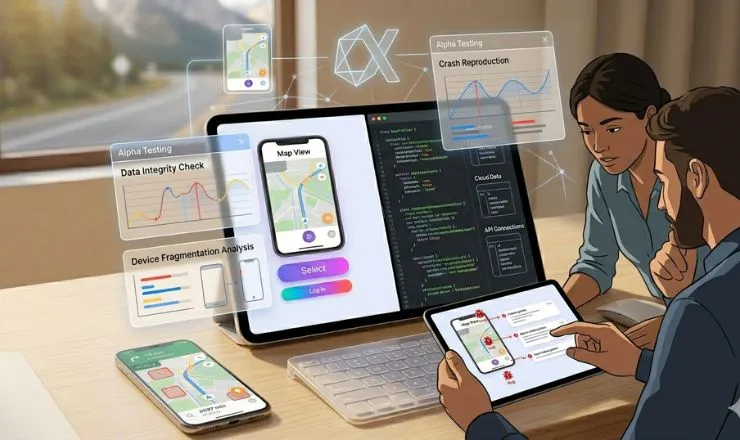
Before you release the app to the target audience, it has to go through various tests and trials. This includes alpha testing as a quality gate, which serves the purpose of catching costly mistakes before they become complex.
You will recruit three types of testers:
Developers who know the code
QA specialists who know how to test for quality assurance systematically
Trusted non-technical colleagues who will use the app like the target audience
Their job is to put the app through every possible situation and report everything that affects the functionality of the user experience.
Focus areas during alpha include:
Crash reproduction - does the app die when you tap certain buttons?
Core workflows - can a new user sign up and complete the main task?
Data integrity - does information save correctly and show up where expected?
Device fragmentation - does it work on both old and new phones?
To be clear, alpha testing is conducted within your team, not your target audience. Skipping this step can prove detrimental because a bug fixed in production can cost about 100 times more compared with a bug fix in the design phase.
This figure accounts for lost revenue, support tickets, bad reviews, and developer time spent on emergency fixes. And so alpha testing helps you find the bug, which costs way cheaper, with just a few minutes of logging and a quick code adjustment.
Phase 7: Beta Testing (Real User Testing)
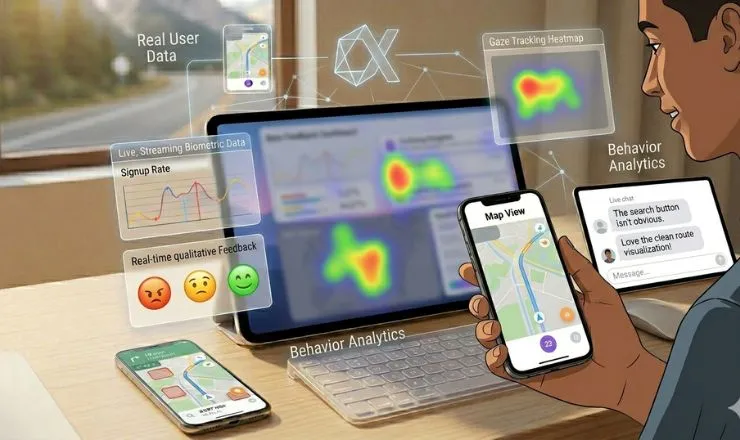
In this phase, you release the app to a different group but under controlled conditions. Now, the app development stages have shifted from internal checks to external feedback loops.
You have two release methods to choose from:
Closed Beta limits access to a small, invited group who test privately
Open Beta throws the doors open to anyone willing to download from TestFlight for Apple or Google Play Console for Android
Each approach has its place, but closed works better for early, raw feedback. To be precise, you should recruit enough users to end up with usable data.
For best results, ask for negative feedback as this is what helps you make targeted improvements. Positive feedback feels nice, but complaints show you exactly what to fix before launch day.
Phase 8: App Store Launch & Deployment
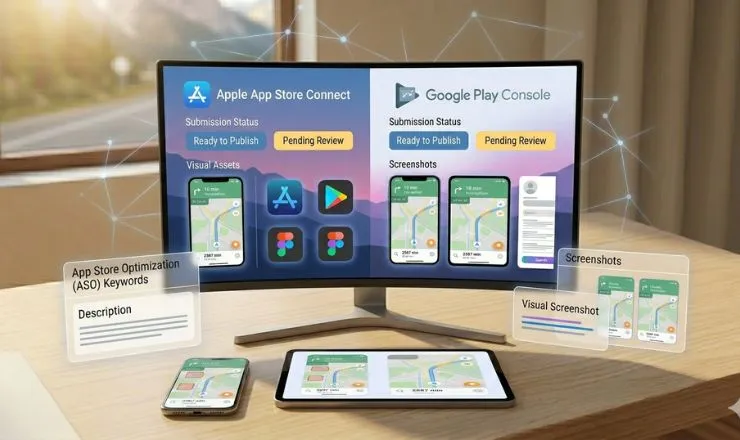
The finish line is finally in sight, but a few gatekeepers still stand between you and the open app market. In this final stretch, the mobile app development steps include submitting your work to the two major stores: Apple App Store and Google Play Store.
You will complete these key steps:
Prepare screenshots that show off your best features
Write a description that hooks people within the first two lines
Set a price or subscription model
Choose age ratings and territories
Consider the Timelines
| Store | Review Timeline |
|---|---|
| Apple App Store | Usually 24–48 hours |
| Google Play Store | A few hours up to 7 days |
Given this, prepare your store listing, including screenshots, keywords, and a privacy policy, during development. Whatever you do, do not wait until the code is done, or you will stare at a finished app for a week while approval drags on.
Phase 9: Post-Launch Maintenance & Updates
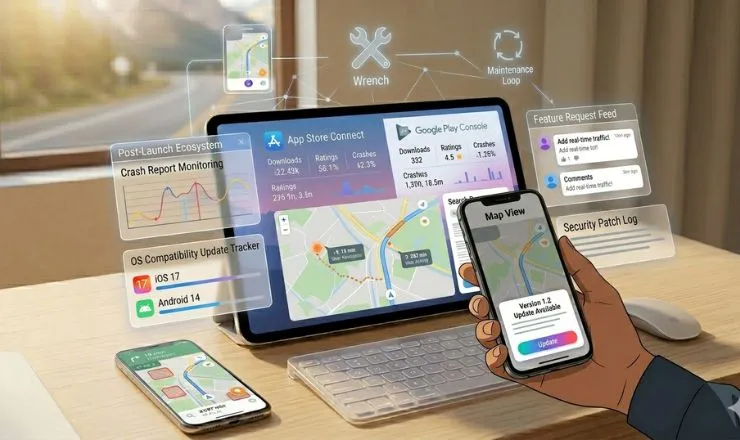
Getting into an app store is actually a new starting point because the mobile app development timeline extends well beyond launch day with four ongoing activities.
What You Will Do After Launch
Monitor crash reports and fix bugs that only appear once real users stress the system.
Release small updates to stay compatible with new phone operating systems from Apple and Google.
Add minor features based on what paying customers actually request
Patch security holes before they become headlines about data breaches.
Why This Matters
Doing these steps protects your reputation as users abandon buggy apps within days. This continuous upkeep helps keep your app in good standing in search results since stores consider update activity among many signals.
Annual maintenance costs typically run between 15–25 percent of what you spent to build the app initially, meaning a 50,000-dollar build requires roughly 7,500–12,500 dollars each year for maintenance. When planning an app, always budget for this reality from day one as apps require regular check-ins and improvements.
How Long Does the Mobile App Development Process Take?
The mobile app development timeline depends heavily on what you are building and how you build it.
Typical Timelines by Project Size
| App Type | Timeline |
|---|---|
| Simple apps with basic screens and no server backend | 1–3 months |
| Medium complexity with user accounts and cloud storage | 3–6 months |
| Complex apps with real-time chat, payments, or custom animations | 6–12 months or longer |
Factors That Extend or Shorten Your Timeline
Number of unique screens and user flows
Whether you need both iPhone and Android versions
Third-party integrations like mapping, payments, or social login
Approval waiting times at Apple and Google app stores
For context, the low-code market is growing rapidly and will reach tens of billions of dollars in 2024. This major number is attributed to AI-powered tools that can reduce development time by 30–50% for certain projects, cutting months off traditional timelines.
Your timeline therefore depends on your chosen approach just as much as it depends on app complexity.
How Much Does Mobile App Development Cost?
The app development cost varies sharply depending on who you hire and what you build. Below are three typical app development cost ranges to help you budget realistically.
Hourly Rates by Region
| Region | Hourly Rate |
|---|---|
| North American developers | 100–250 dollars per hour |
| Eastern European developers | 30–80 dollars per hour |
| South Asian developers | 20–50 dollars per hour |
Five Factors That Drive Your Final Bill
Number of screens and their complexity
Whether you need both iPhone and Android versions
Backend infrastructure like user accounts and cloud storage
Third-party integrations such as payments or maps
Ongoing maintenance and update costs after launch
A major cost variable is the team you hire. You can cut down costs by a great margin if you focus on hiring a dedicated team of app developers.
App Development Is a Continuous Process
The mobile app development lifecycle is a loop of continuous improvement from idea to launch and ongoing maintenance. The global mobile application market is projected to reach USD 626.39 billion by 2030, and many consumer apps still fail to gain traction.
To be clear, the difference between success and failure is not budget alone, but how well you validate demand before coding, follow the stages, and launch something people actually need. Therefore, continue following the stages with precision so that your app receives the response it is intended to create.
Frequently Asked Questions
Q: What are the steps to develop a mobile app?
A common framework includes ideation, planning, design, development, testing, and deployment or maintenance. Some guides, however, break these into more detailed stages such as research, prototyping, launch, and ongoing maintenance.
Q: Can ChatGPT 4 build an app?
Not alone, but AI-assisted coding and low-code tools can help speed up development.
Q: Do I need an LLC to start an app?
No, but you do need an Apple Developer Program membership at 99 USD per year and a Google Play developer account with a 25 USD one-time fee to publish on those stores.
Q: What type of app is most profitable?
Subscription-based apps are often among the strongest revenue models because they generate recurring income and fit apps that deliver ongoing value.